These videos demonstrate basics of getting a fast, accurate autorefraction and keratometry measurement, and techniques for making sure you always get the best results. Keratometry on QuickSee Free Pro only
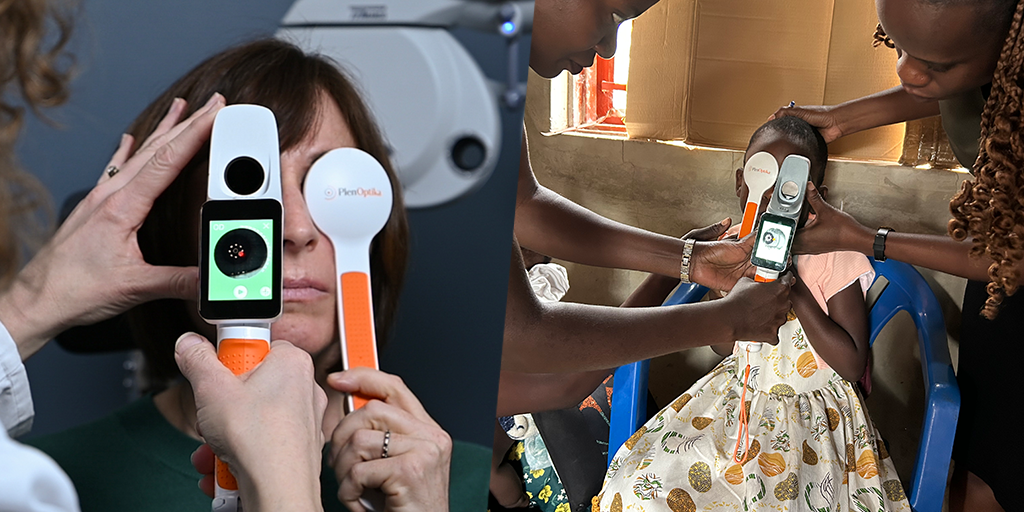
These courses will help you and those who work for you know how to successfully use QuickSee Free / Free Pro for measurements in the clinic and in eyecare outreach, to manage patient data, and to train others.
Basic operators
This introductory course includes the minimum training needed to begin taking accurate measurements, and to understand the device accessories.
This course trains operators for complete clinical use of QuickSee Free, from capturing accurate measurements through advanced use cases, device settings, and the patient report.
These basic steps will help you start measuring quickly, and avoid common errors.
1. Preparation
Attach the eyecup to the device.
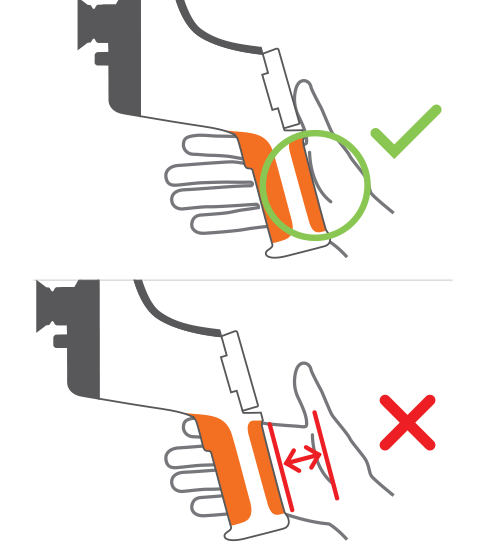
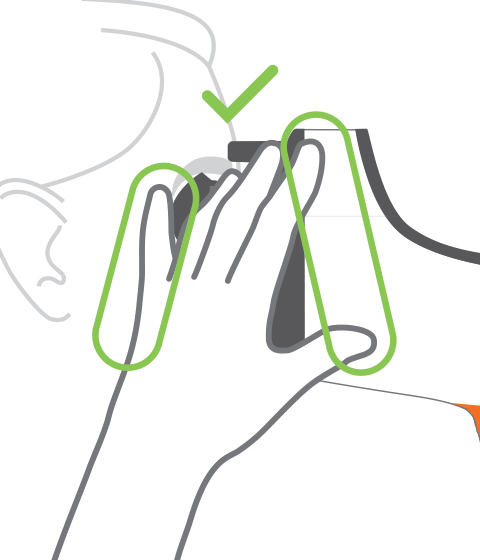
Hold the device with your palm resting on the side of the handle, ensuring a firm but comfortable grip.
2. Positioning
Position device on eye; use occluder over other eye; instruct patient to keep eye open.
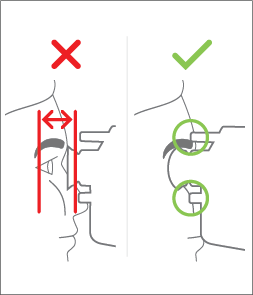
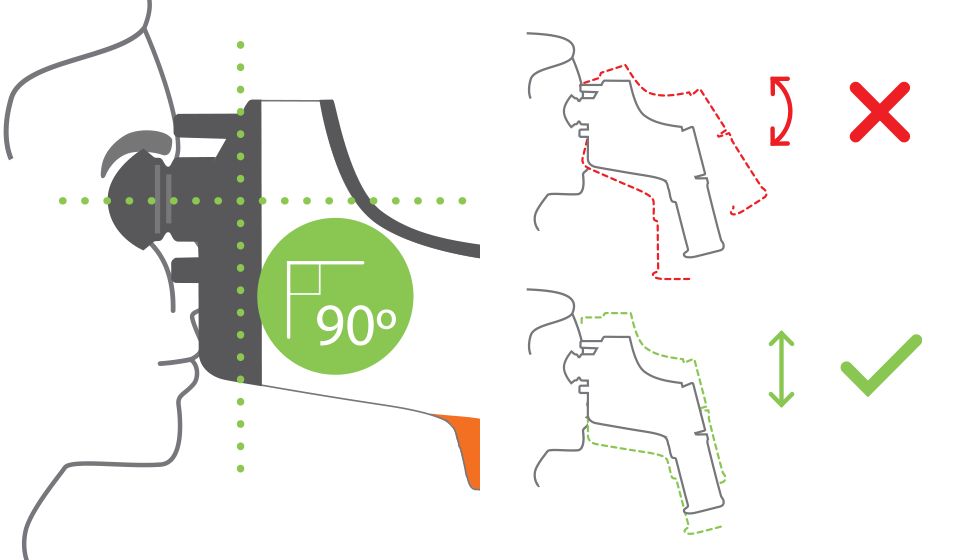
Seat device comfortably on patient’s face. Both contact points should touch face. Eyecup should cover orbit of the eye.
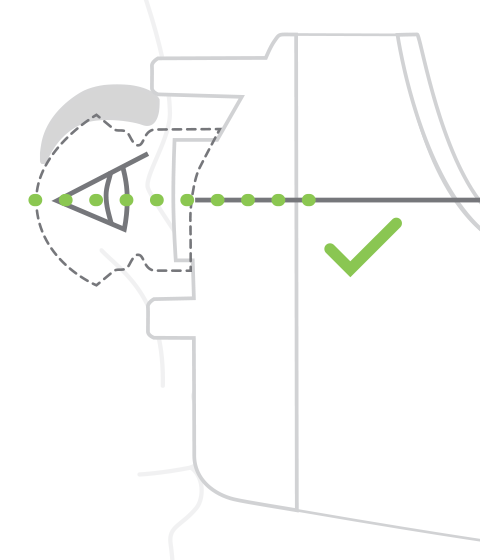
Align line on device side with patient’s lateral canthus (outside corner of the eye).
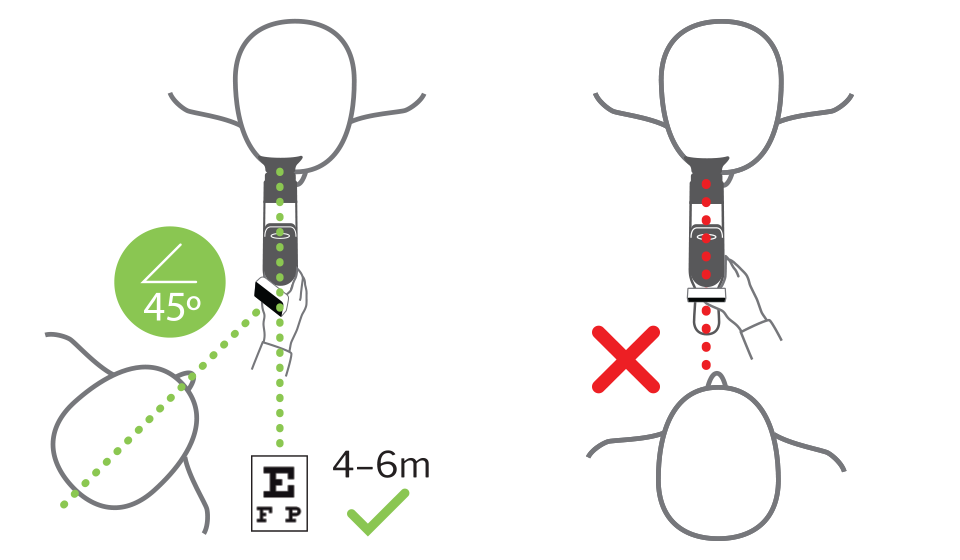
Steady the device by bridging it to the patient’s face or holding their shoulder with your off hand.
Stand to one side of the patient. Instruct the patient to look at a target 4–6m away. The patient must not look at the red dot in the optical channel.
2. Alignment
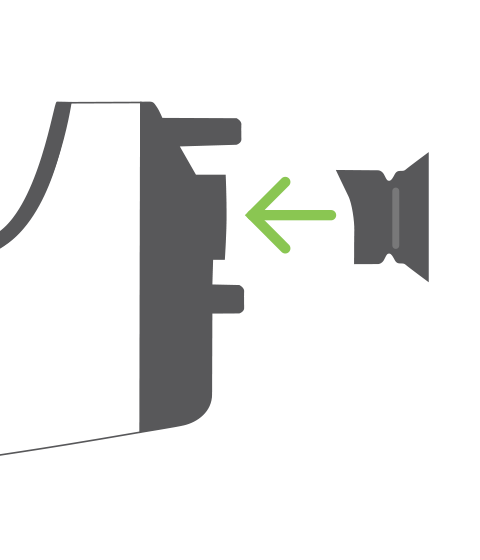
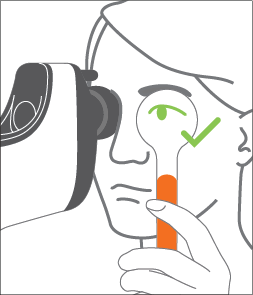
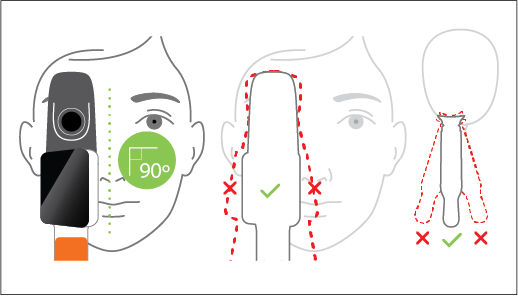
Do not tilt, rotate, or turn the device. Slide the device up or down to align.
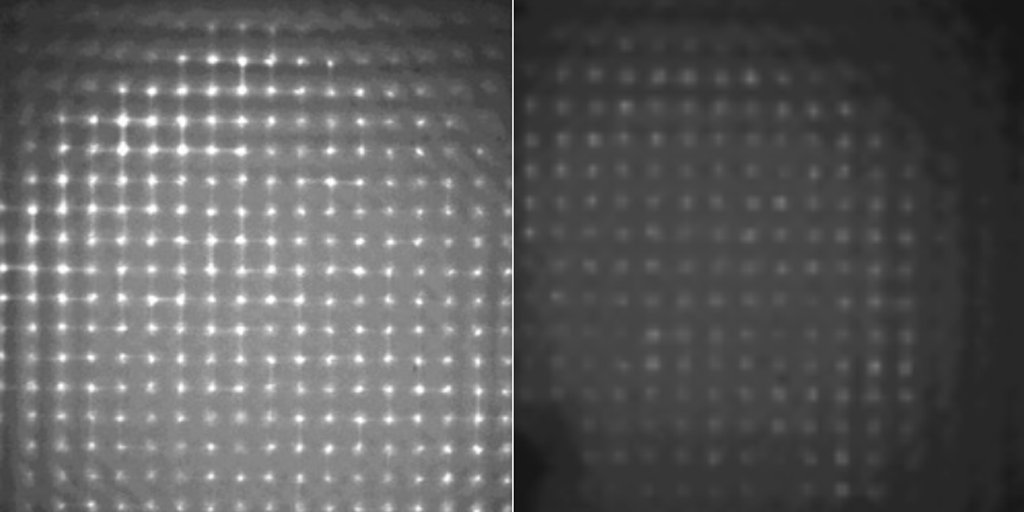
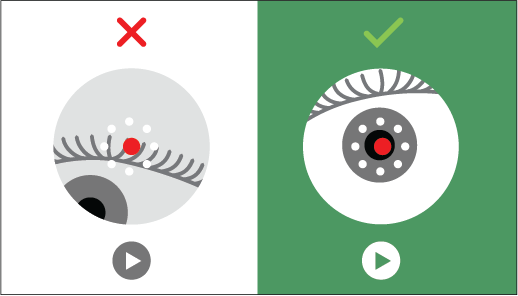
The red dot should be over the patient’s pupil. The background will turn green when the camera is aligned.
3. Measurement
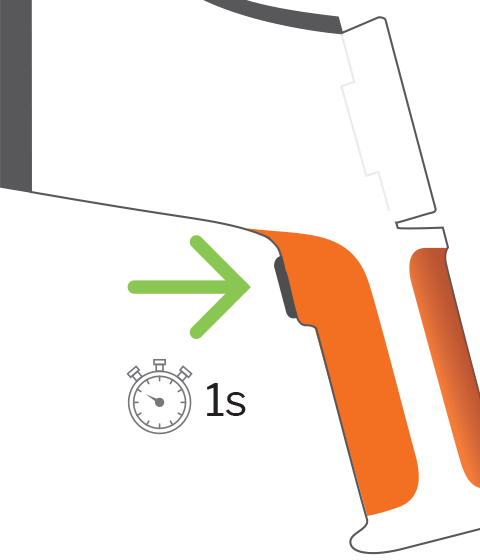
When the display turns green, the device is ready to measure. Press the start button on the handle.
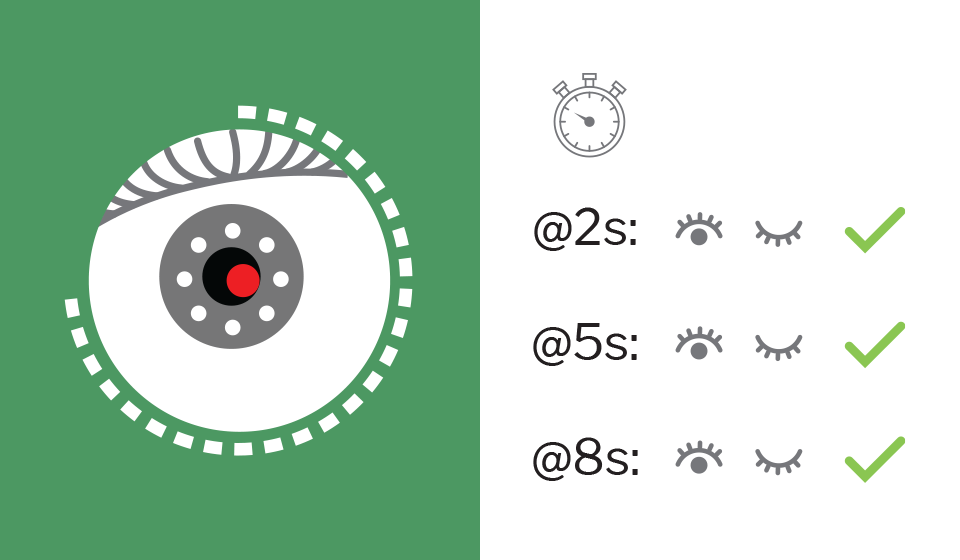
A dotted line around the pupil camera will indicate measurement progress. Instruct the patient to blink 2-3 times during measurement.
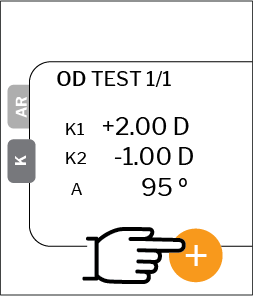
4. Results and new measurement
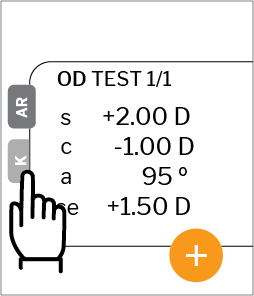
Autorefraction results displayed on the screen. Keratometry results are available on the QuickSee Free Pro
Press the plus button to start a new measurement.
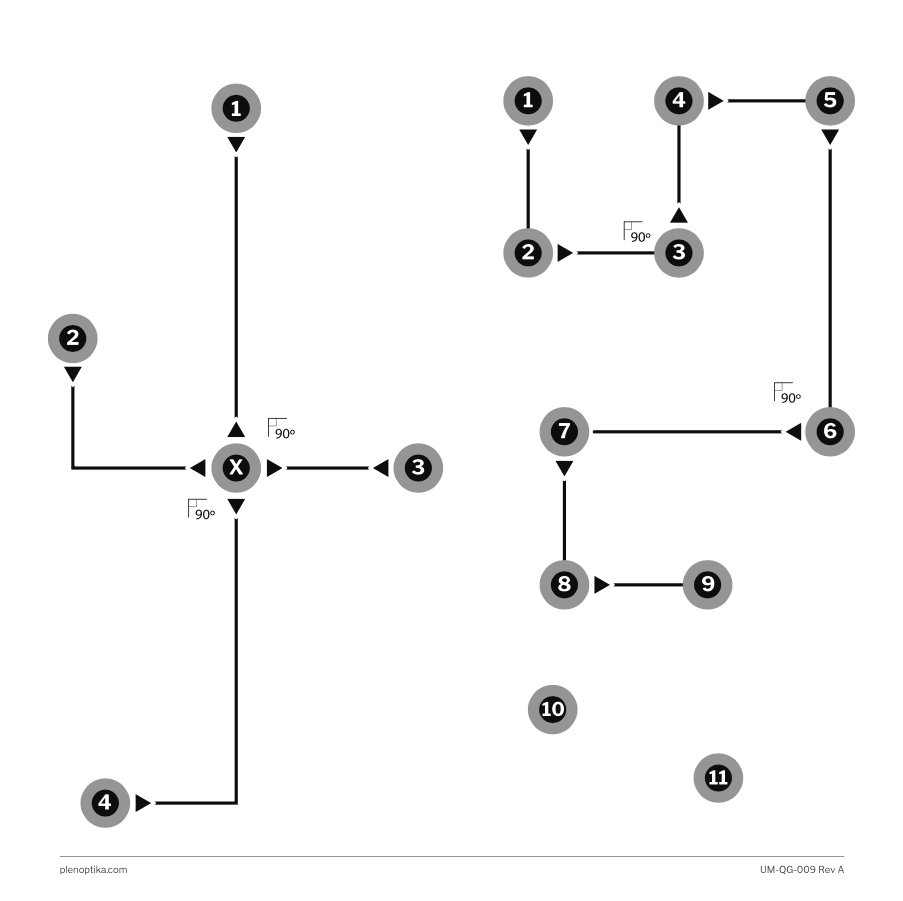
Alignment training and visual target
Alignment guide
This 200mm x 200mm diagram helps operators learn how to correctly achieve alignment but moving the device up, down, left, and right, and center it on the patient’s pupil.
The alignment guide ships with QuickSee Free and QuickSee Free Pro after September, 2025.
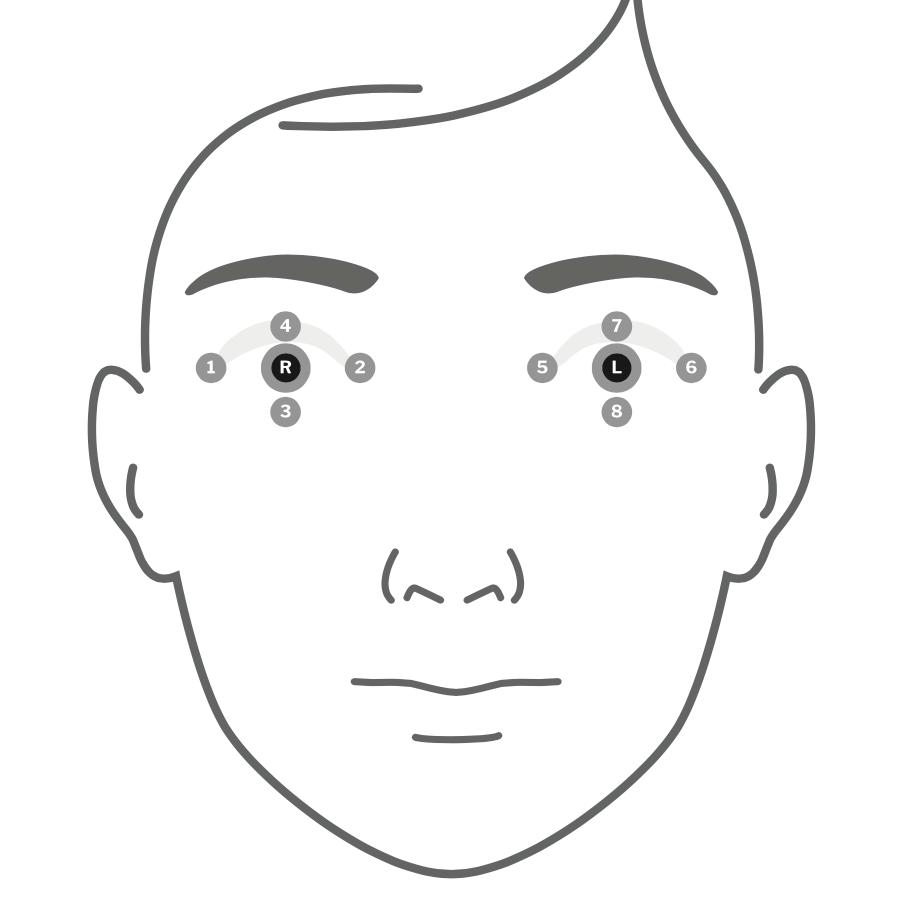
This 400mm x 400mm image provides operators an appropriate visual target to direct their patient’s attention to. The target should be hung 4–6 meters away from the patient.
The visual target ships with QuickSee Free and QuickSee Free Pro after September, 2025.
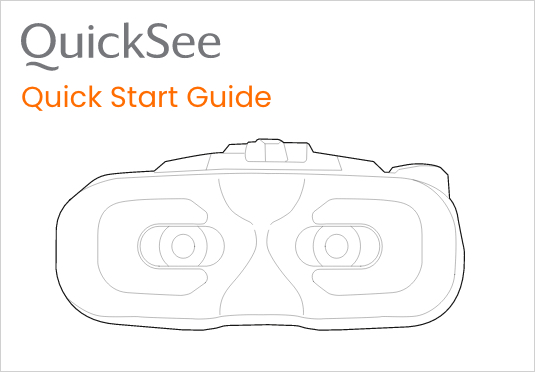
This two-page PDF gives you an overview of QuickSee operation, to have you taking measurements in just a few minutes. Make sure QuickSee is charged before starting!
Remove the eyecup to thoroughly clean it and the viewports.
Do not submerge QuickSee in liquid.
See the BASIC CARE section of the QuickSee User Manual for more information.
Pre-align the optical channels to the patient’s pupils
Pre-align the PD while standing at a safe distance to the patient. You will likely underestimate PD, so if alignment is not immediately correct once you put QuickSee to the patient’s face, first try widening the PD.
Stand at the patient’s right side during measurement
Use QuickSee while standing at the patient’s right shoulder, instead of directly in front of them, thereby reducing direct exposure to one another’s breath.
Use QuickSee anywhere it’s convenient
QuickSee is not sensitive to ambient light, so it works indoors and outdoors. Use QuickSee while the patient is in their car or waiting outside the examination room.
Are you ready to learn how to use QuickSee Free / Free Pro effectively? Tell us about yourself and your circumstances and we will reach out to arrange a training session with you.
Are you ready to learn how to use QuickSee Free / Free Pro effectively? Tell us about yourself and your circumstances and we will reach out to arrange a training session with you.